Building a 'Mini-AWS' in 15 Minutes: The MicroCloud Single-Node Guide

Welcome back, guys! Hope everyone is doing well.
Recently, our professor introduced us to MicroCloud, a service we can use to manage clusters of private computers. It sounded pretty powerful in class, I wanted to see if I could actually get it running on my own hardware.
What if you could take a standard Ubuntu instance and transform it into a fully functional, multi-tenant private cloud in the time it takes to grab a coffee? Using the Canonical "Micro" stack, I did exactly that.
Here is the ultimate, step-by-step blueprint for building your own "Mini-AWS" on a single node.
1. The Laboratory: VirtualBox VM Setup
Before we touch the terminal, we need to set the stage. If your "hardware" isn't configured correctly, the Micro stack will fail during initialization.
Hardware Specifications
CPU: 2 Cores (Minimum). CRITICAL: Go to System > Processor and check "Enable Nested VT-x/AMD-V". Without this, you cannot run nested virtual machines inside your cloud.
RAM: 8GB is the sweet spot. You can survive on 4GB, but it will be sluggish.
Storage (The Dual-Disk Strategy):
Disk 1: 25GB (VDI) for the Ubuntu OS installation.
Disk 2: 20GB (VDI) of RAW unallocated space.
Note: When creating Disk 2, do not initialize or format it in the guest OS. MicroCeph needs it completely raw.
2. VirtualBox Network Architecture
You need two separate "wires" plugged into this VM for the cloud fabric to function.
Adapter 1 (Management): Set to NAT. This provides internet access so we can download our tools.
Adapter 2 (Fabric): Set to Internal Network (Name it
micro-fabric).- Go to Advanced and set Promiscuous Mode to "Allow All". This allows the virtual switch (OVN) to see all traffic.
3. Ubuntu OS: Network Check and Setup
Once Ubuntu 24.04 LTS is installed, we need to ensure the second adapter is "awake" but "silent."
Run ip a to see your interfaces. You'll likely see:
enp0s3: Has an IP (from NAT).enp0s8: State is DOWN or has no IP.
We need enp0s8 to be UP for MicroCloud to detect it, but it must NOT have an IP address. Run:
sudo ip link set enp0s8 up
Verification: Run ip a show enp0s8 and ensure it says <UP,LOWER_UP> but doesn't have an inet line.
4. Services Installation
We use the Snap package manager because it handles the complex dependencies between these four services automatically.
sudo apt update && sudo apt upgrade -y
sudo snap install lxd microcloud microceph microovn --cohort="+"
5. Storage Checking & Configuration
MicroCloud will refuse to use a disk if it thinks there is important data on it. We use lsblk to verify our hardware and wipefs to clean it.
Check disks:
lsblk- You should see
sdb(20G) with no mount points and no partitions.
- You should see
The "Safety Wipe": Even if the disk looks empty, run this to be sure:
sudo wipefs --all --force /dev/sdbIf you see partitions like
sdb1orsdb9, this command will nukes them, leaving a clean slate for MicroCeph.
6. MicroCloud Init: The Full Setup
This is the big moment. Run sudo microcloud init.
Follow these steps exactly for a single-node success:
More than one cluster member?
noAddress for MicroCloud:
10.0.2.15(or whatever your NAT IP is).Local Storage?
yes(It should find/dev/sdb).Distributed Networking?
yes(It should findenp0s8as the "Uplink").IPv4 Gateway:
10.10.10.1/24(This is your Cloud's virtual router).IPv4 Range:
10.10.10.10 - 10.10.10.100(IPs for your future instances).DNS:
8.8.8.8, 1.1.1.1
The system will now spend 2-3 minutes spinning up the OVN database and Ceph monitors.
7. Browser Certificate Setup
Now we move from the terminal to the web.
Open your browser to https://127.0.0.1:8443 (assuming you set up Port Forwarding in VirtualBox for 8443).
Note: You will see a "Your connection is not private" warning. This is because the server generated its own security certificate. Click "Advanced" and "Proceed".
8. TLS User Creation & Key Generation
The dashboard will load, but it's locked. It will ask for a Certificate or Token. We handle this via the "Trust Flow."
In your terminal, run:
This command generates a one time password (Token).
Copy that token and paste it into the browser window.
Your browser will now generate its own TLS Private Key and send the public part to the server.
Explain: This handshake ensures that ONLY your browser has the cryptographic key to manage the cloud.
9. BOOM!! You’re in the Cloud.
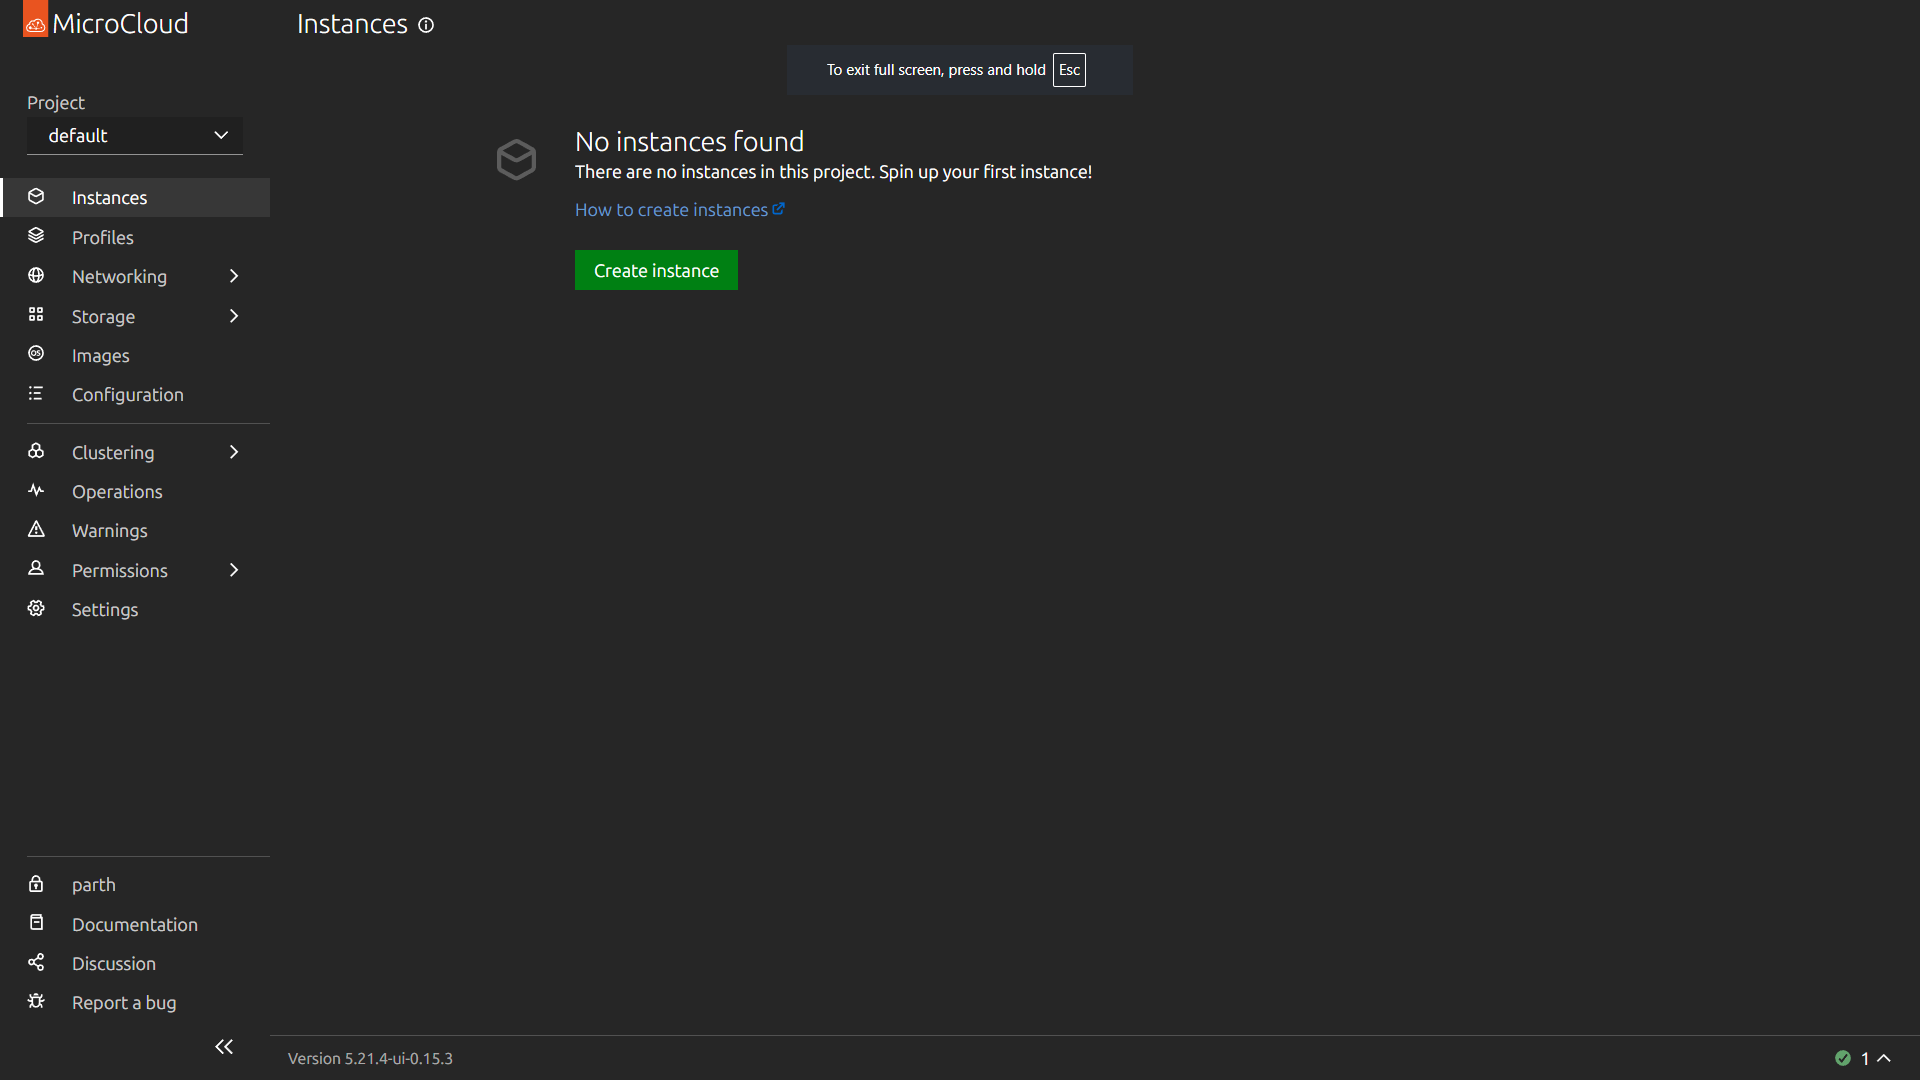
If you see the LXD Dashboard with a green "Online" status next to your node name—BOOM!! You just built a private cloud.
From here, you can click "Create Instance", pick an image (like Ubuntu or Alpine), and watch as it gets a private IP from your 10.10.10.x range and its own dedicated slice of the sdb storage pool.
Why This Matters
Zero Cost: No AWS bills.
Privacy: Your data stays on your disks.
Skills: You are now using the same tech (Ceph/OVN) that powers massive data centers.
The Cloud isn't a place you go to; it's a system you build.
Hope this helps you guys get your labs up and running! Stay tuned for next updates!